- admin
- Comments 0
- 04 Apr 2025
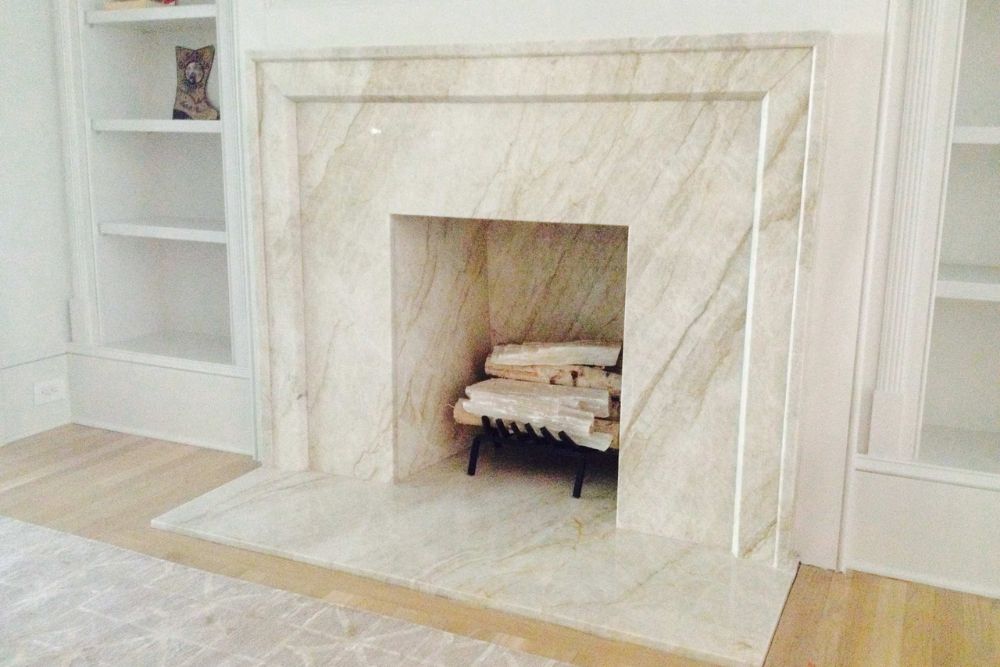
Flush Hearth in Wood Floor White Quartzite: A flush hearth, especially one made of a beautiful stone like white quartzite, can make any room look much better by making the shift from the fireplace to the wood floor look smooth and modern. If you want to build a beautiful and useful flush fire out of white quartzite, this guide will show you how to do it.
Installing a Flush Hearth in a Wood Floor with White Quartzite
1. Understanding White Quartzite and Its Benefits
White quartzite is a natural stone known for its durability, elegance, and resistance to heat and scratches. It’s an excellent choice for a hearth as it combines the beauty of marble with the strength of granite.
Explanation: Quartzite starts off as sandstone. Intense heat and pressure then transform it into a tight, sturdy rock. It usually comes in a soft white or light gray shade, and it subtly showcases sleek veins. Its refined look can complement wood floors nicely. Looking past its beauty, quartzite’s talent for enduring heat makes it a perfect fit for a fireplace. It can tackle the highest temperatures a hearth can whip up. Plus, its surface can resist scrapes. This means the hearth can stay looking fresh, even in busy spots. If you go with white quartzite, it will not only uplift your fireplace’s look but also promise you a hearth that’s built to last and resist daily scuffs.
2. Planning and Measuring the Hearth Area
Before starting the installation, precise planning and measurement are crucial. Determine the size and shape of the hearth, ensuring it complements the fireplace and the surrounding floor space.
Explanation: To figure out the size of the hearth, first measure the width and depth of the fireplace hole. Think about the white quartzite slab’s size to make sure it fits in the space you’ve set aside without taking over the room. A common way to make the fireplace look balanced is to have the floor stick out a few inches past the front and sides. Also, think about how thick the quartzite rock is compared to the wood floor. You want the hearth to be level with the floor around it. When you plan well, you should also check the subfloor under the wood to make sure it can hold the weight of the granite slab, which is heavier than other hearth materials.
3. Cutting and Preparing the Wood Floor
Now that you have the measurements, you need to cut the wood floor to fit the white quartzite pit. To make sure a perfect fit and a smooth transfer, this needs to be done very precisely.
Explanation: Grab a pencil and straightedge to sketch the hearth’s shape on the wooden floor. Be sure of your measurements before you begin to cut, to avoid any errors. Usually, we use a circular saw or jigsaw to trim along the drawn lines. Make sure you’re cutting slowly and carefully, for neat, straight boundaries that will hold the quartzite slab tightly. Once you’ve finished, lift out the piece of wood flooring to show the subfloor. Now, look over the subfloor for any unwelcome surprises or softer areas. If the subfloor isn’t flat or feels weak, ensure you adjust or support it before moving on with setting up the hearth. Making sure the subfloor is ready and robust is vital for a stable and level quartzite placement.
4. Installing the White Quartzite Hearth
The installation of the quartzite hearth involves setting the stone into the prepared space, ensuring it is level with the surrounding wood floor for a flush finish.
Explanation: First, apply a powerful glue to the ground, made for stony or bulky items. Now, place the white quartzite piece into the wood floor’s cut-out part accurately. It should fit just right. With a tool, check if the quartzite is at the same level as the wood floor. If it isn’t right, add or subtract glue in some spots. We aim for the quartzite to be flat with the wood floor, resulting in a smooth change that’s good on the eyes and handy. After the quartzite is sitting right, let the glue harden. This process can take up to many hours or the whole night, based on the used product. During the hardening, don’t put any heavy stuff or force on the hearth to keep the bonding safe.
5. Finishing the Edges and Sealing the Quartzite
Once the quartzite is firmly in place, the last step is to smooth out the sides and seal the stone to keep it from getting stained or broken.
Explanation: Check the edges where the wood floor meets the quartzite. Use a color-matched caulk or wood filler to fill in any gaps and make the transfer smooth. If you need to, lightly sand the sides to make sure the surface is flush. When you’re done with the edges, you should seal the granite to keep it from getting stained, especially if you use your fireplace a lot. You should pick a good stone sealer that is made for granite and follow the directions on the bottle. Not only does sealing the stone protect it from spills, soot, and other stains, but it also brings out the stone’s natural beauty by bringing out the faint veining. If you take good care of your white quartzite hearth, it will be a beautiful center point in your home for many years to come.
Easy Steps to Install a Flush Hearth with White Quartzite in a Wood Floor
These simple steps will make it easy to put in a flush fire with white quartzite in a wood floor. This guide will help you do the job quickly and carefully so that it looks like it was done by a professional.
1. Gather Your Tools and Materials
- White quartzite slab
- Circular saw or jigsaw
- Measuring tape and straightedge
- Adhesive suitable for stone
- Level
- Caulk or wood filler (color-matched)
- Stone sealer
Quick Tip: Make sure all tools and materials are readily available before starting to streamline the process.
2. Measure and Mark the Area
- Measure the dimensions of the fireplace and decide on the size of the hearth.
- Mark the outline on the wood floor with a pencil.
Quick Tip: Double-check your measurements to avoid errors when cutting the floor.
3. Cut the Wood Floor
- Use a circular saw or jigsaw to cut along the marked lines.
- Remove the cut section of the wood floor to expose the subfloor.
Quick Tip: Cut slowly and precisely to ensure clean edges and a snug fit for the quartzite.
4. Prepare the Subfloor
- Check the subfloor for level and stability.
- Add underlayment if needed to ensure the quartzite sits flush with the wood floor.
Quick Tip: Use a level frequently to ensure the subfloor is even and ready for the quartzite installation.
5. Install the Quartzite Hearth
- Apply adhesive to the subfloor.
- Carefully position the quartzite slab into the cutout area.
- Use a level to ensure it is flush with the surrounding wood floor.
Quick Tip: Adjust the slab quickly before the adhesive sets to ensure a perfect fit.
6. Finish the Edges and Seal the Quartzite
- Fill any gaps between the quartzite and the wood floor with color-matched caulk or wood filler.
- Lightly sand the edges for a smooth transition.
- Apply a stone sealer to protect the quartzite and enhance its appearance.
Quick Tip: Seal the quartzite to protect against stains and bring out its natural beauty.
Conclusion
This guide explains how to install a flush hearth in wood floor with white quartzite. White quartzite is a natural stone known for its durability, elegance, and resistance to heat and scratches. It’s a perfect fit for a fireplace, as it can handle high temperatures and resist scrapes. To install the hearth, follow these steps:
1. Understand the benefits of white quartzite, such as its durability and resistance to heat and scratches.
2. Plan and measure the hearth area, ensuring it complements the fireplace and surrounding floor space.
3. Cut and prepare the wood floor to fit the quartzite pit.
The installation of a white quartzite hearth involves setting the stone into the prepared space, ensuring it is level with the surrounding wood floor for a flush finish. Apply a powerful glue to the ground and place the quartzite piece into the cut-out part of the wood floor. Let the glue harden, avoiding heavy stuff or force on the hearth. After the quartzite is firmly in place, smooth out the sides and seal the stone to prevent stains or brokenness. Use color-matched caulk or wood filler to fill gaps and lightly sand the edges. Seal the quartzite to protect it from stains and enhance its natural beauty.